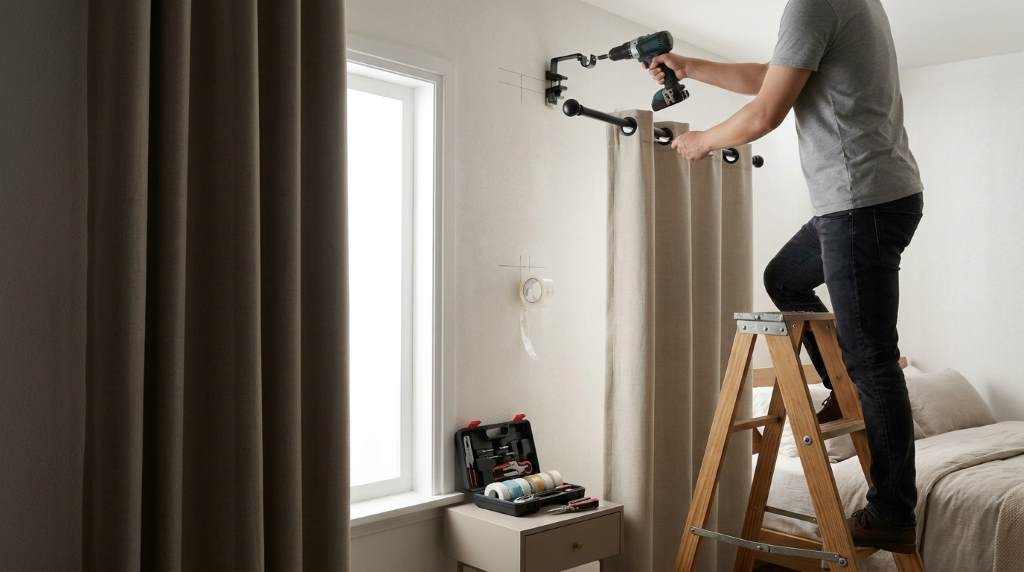
To install blackout curtains faster, measure once, mark accurately, prepare every tool, then mount the rod before hanging panels. For better light control, position the rod higher and wider than the window frame. About one in three U.S. adults report sleeping less than seven hours daily, making a darker bedroom especially useful. Choosing the right Blackout Curtains Bedroom setup can also reduce morning glare and improve privacy. The fastest installation does not mean skipping measurements. Instead, it means eliminating unnecessary drilling, repeated adjustments, and hardware mistakes.
Key Takeaways
- Measure the window and mounting area before opening the hardware package.
- Mount the rod higher and wider to reduce unwanted light gaps.
- Use a level, pencil, drill, screwdriver, and suitable wall anchors.
- Prepare curtain panels before lifting the rod onto its brackets.
- Choose floor-length panels when stronger bedroom light control matters.
- Test the finished installation during daylight before calling the job complete.
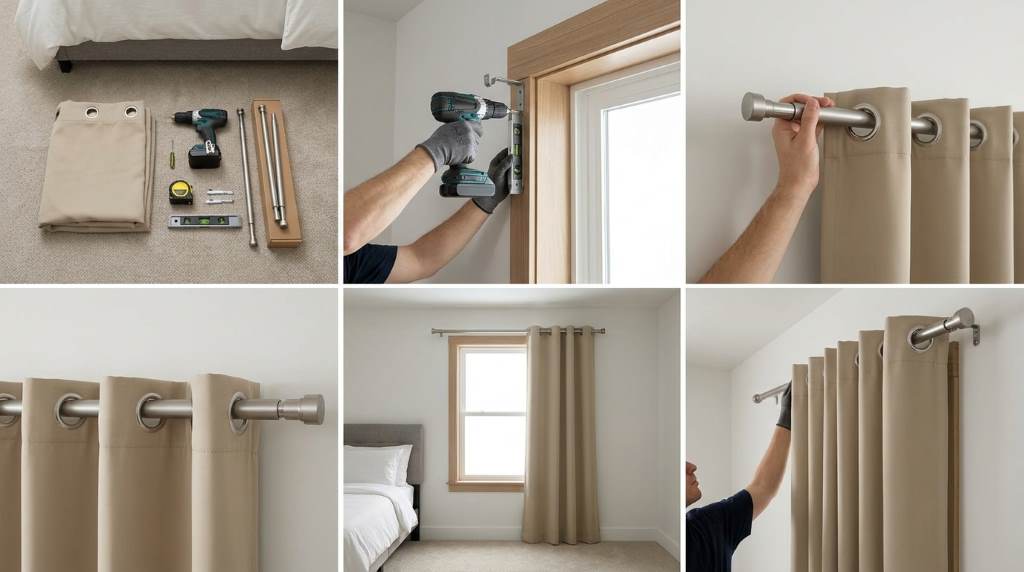
Why Fast Installation Starts Before You Drill
A rushed installation usually takes longer because small mistakes create repeated adjustments. Therefore, spend several minutes planning before touching the wall. Check the window trim, nearby furniture, electrical outlets, vents, and existing blinds. Also inspect the curtain packaging for brackets, screws, anchors, rings, and finials.
Next, read the rod manufacturer’s mounting instructions because hardware designs vary considerably. Some brackets require specific screw types or spacing. Meanwhile, wider windows may require a center support to prevent the rod from bending under heavy fabric.
Prepare These Tools First
- Measuring tape
- Pencil
- Bubble level
- Drill and appropriate drill bit
- Screwdriver
- Wall anchors when studs are unavailable
- Step ladder for elevated mounting positions
Keeping everything beside you prevents repeated trips across the bedroom. Consequently, you can complete the installation in one continuous sequence.
Measure the Window for Faster Installation
Start by measuring the window width from the outside edges of the frame. Then measure the height from the preferred rod position to the floor. Repeat each measurement once to catch obvious reading errors before marking anything.
For stronger blackout performance, allow the rod to extend beyond both sides. A practical starting point is four to eight inches beyond each side. However, wider extensions can provide better coverage when the surrounding wall allows them.
Also consider the curtain’s total fabric width, not merely the window width. Two panels need enough material to overlap naturally when closed. Otherwise, the center seam can create an unwanted strip of morning light.
Use the High-and-Wide Mounting Method
Positioning the rod higher than the frame reduces light entering above the curtain. In many bedrooms, four to six inches above the frame provides a practical starting point. If the ceiling allows it, mounting closer to the ceiling can create a taller appearance.
Extend the rod beyond both sides of the window to cover the surrounding wall. This approach reduces side leakage when curtains close. It also allows the panels to stack away from the glass when you want natural daylight.
| Installation Area | Practical Starting Point | Purpose |
|---|---|---|
| Above window | 4 to 6 inches | Reduces top light gaps |
| Beyond each side | 4 to 8 inches | Reduces side light gaps |
| Panel length | Floor length | Reduces bottom exposure |
| Center overlap | Several inches | Reduces seam leakage |
Mark the Brackets Before Installing Them
Place the first bracket at your selected height and mark its screw holes lightly. Then measure across the window and mark the opposite bracket at exactly the same height. Use a level across both marks before drilling.
This simple check prevents a tilted curtain rod from ruining an otherwise clean installation. Furthermore, level brackets help curtain panels slide smoothly across the rod. If the rod includes a center support, mark that position after confirming the outer brackets.
Check the Wall Structure
Whenever possible, attach brackets directly to wall studs for stronger support. If studs do not align with your preferred locations, use anchors designed for your wall material. Never assume every supplied anchor works equally well on drywall, plaster, masonry, or other surfaces.
For heavier blackout panels, stronger mounting matters because repeated opening and closing creates additional stress. Therefore, select hardware according to the combined weight of the rod and curtains. A secure bracket also prevents frustrating repairs later.
Install the Rod Without Wasting Time
Drill pilot holes only after confirming every measurement and bracket mark. Then install the anchors or screws according to the wall type. Tighten each bracket firmly without overtightening delicate hardware.
Before placing the curtain rod, check each bracket visually for alignment. Next, lift the rod into position and confirm that every support captures it correctly. If your rod uses locking screws, tighten them after confirming the final position.
For wide windows, ask another person to hold one side while you secure the other. This simple step reduces bending, dropped hardware, and accidental wall damage. It also makes the installation significantly easier for heavier blackout curtains.
Prepare the Blackout Curtains Before Hanging
Unpack the curtain panels before mounting them permanently. Separate the panels, identify the top edge, and confirm the opening style. Rod pockets, grommets, rings, and back tabs each require slightly different preparation.
Remove major packaging folds before installation when the care label permits steaming or ironing. Wrinkles become harder to manage after the panels hang. However, always follow the manufacturer’s fabric-care instructions before applying heat.
Attach the Panels in the Right Order
For rod-pocket curtains, slide the rod smoothly through the pocket without bunching the fabric. For grommet curtains, feed the rod through each opening from the same direction. If you use rings, distribute them evenly for smoother movement.
Keep the outermost curtain edges positioned beyond the window frame. Then center the panels and create a small overlap where they meet. This arrangement helps prevent a bright vertical line from appearing between the panels.
Fix the Four Most Common Light Gaps
Even excellent blackout fabric can allow light around its edges. Therefore, inspect the installation instead of judging performance from the fabric alone. The most common leakage points occur above, beside, below, and between the panels.
- Top gap: Raise the rod or add a suitable top treatment.
- Side gaps: Extend the rod farther beyond the window frame.
- Bottom gap: Use floor-length panels that reach the floor.
- Center gap: Overlap the panels slightly when they close.
For persistent side leakage, consider wraparound brackets that bring the curtain closer to the wall. Magnetic strips or removable edge fasteners can provide additional sealing. Choose removable solutions when you rent or frequently change your window treatment.
Install Blackout Curtains Over Existing Blinds
You can install blackout curtains without removing functioning blinds. Simply mount the curtain rod far enough forward to clear the blind headrail and operating hardware. Then close the blinds before drawing the blackout panels.
This layered arrangement provides useful flexibility throughout the day. The blinds handle privacy and daylight adjustment, while the curtains provide stronger nighttime coverage. Before drilling, verify that the rod depth clears handles, cords, and other window components.
Use a No-Drill Method When Speed Matters
No-drill installation can save time when the wall cannot accept permanent hardware. Tension rods, removable brackets, adhesive mounts, and hook systems offer several temporary options. However, each solution has weight and durability limitations.
Tension rods work best inside suitable window recesses with compatible curtain weights. Adhesive brackets require clean surfaces and careful weight selection. For heavy blackout panels, permanent brackets usually provide more dependable long-term support.
Choose the Method Based on Your Goal
| Method | Installation Speed | Best Use |
|---|---|---|
| Standard wall brackets | Fast | Permanent bedroom installation |
| Tension rod | Very fast | Suitable recessed windows |
| Removable brackets | Fast | Rental-friendly setups |
| Ceiling track | Moderate | Large windows and stronger coverage |
Make Floor-Length Curtains Work Better
Floor-length curtains generally provide better bedroom coverage than short panels. They also create a more finished appearance around tall windows. Aim for the hem to meet the floor without creating excessive fabric piles.
Keep the fabric away from heaters, radiators, and ventilation openings. Excess fabric can interfere with airflow or create unnecessary wear. Therefore, prioritize both blackout performance and safe clearance around heating equipment.
Speed Up Future Curtain Installations
Once you complete one window, record the successful measurements for similar windows. Keep the tape measure, level, screwdriver, and drill together in one project container. This small habit makes future curtain installations much faster.
You can also create a simple mounting template from cardboard. Mark the bracket holes and preferred height on the template. Then transfer those positions consistently to matching windows without repeatedly calculating measurements.
Use a Simple Installation Sequence
- Measure the window and available wall space.
- Choose the rod position and confirm curtain length.
- Gather every tool and mounting component.
- Mark both outer brackets at equal heights.
- Check alignment with a level.
- Install appropriate anchors or screws.
- Attach the rod and center support.
- Prepare and hang the curtain panels.
- Center the panels and create slight overlap.
- Test the room for daylight leakage.
Following this order removes unnecessary backtracking during installation. More importantly, it separates planning decisions from physical installation tasks. That makes the entire project faster and less frustrating.
Test the Curtains Before You Finish
Do not judge your installation immediately after hanging the panels. Close everything during daylight and stand inside the bedroom for several minutes. Give your eyes time to adjust before inspecting the edges.
Look carefully above the rod, beside both panels, beneath the hem, and around the center seam. Small bright lines reveal exactly where your installation needs adjustment. Fix the largest gap first because it usually produces the biggest improvement.
Common Installation Mistakes to Avoid
- Mounting the rod exactly within the window’s width.
- Installing brackets at different heights.
- Using weak anchors for heavy blackout panels.
- Choosing curtains that stop well above the floor.
- Ignoring the center gap between two panels.
- Skipping a daylight test after installation.
- Drilling before checking hidden obstacles and wall structure.
These mistakes seem minor, yet they often create unnecessary work later. Therefore, a careful five-minute planning stage can save much longer repair work.
When Should You Replace the Installation Hardware?
Replace damaged brackets, stripped screws, bent rods, or loose anchors before rehanging heavy curtains. Continuing to use compromised hardware can cause the rod to sag or fall. Likewise, replace hardware that cannot safely support the current curtain weight.
Consider a stronger rod when your panels feel difficult to move or visibly pull downward. A center support can help wide installations when the rod design permits one. However, avoid adding supports where they interfere with curtain movement.
Frequently Asked Questions
How high should I install blackout curtains?
Install the rod about four to six inches above the window frame, or closer to the ceiling when practical.
How far should blackout curtains extend beyond the window?
Extend the rod roughly four to eight inches beyond each side for better light coverage.
Can I install blackout curtains without drilling?
Yes, tension rods and removable brackets can work when the curtain weight and window structure support them.
Should blackout curtains touch the floor?
Yes, floor-length panels usually provide better bottom coverage while creating a cleaner bedroom appearance.
Why do blackout curtains still let light in?
Most unwanted light enters through gaps above, beside, below, or between the curtain panels.
Final Thoughts
The fastest way to install blackout curtains is to plan the coverage before mounting anything. Measure twice, mark level brackets, choose appropriate hardware, and prepare every curtain component first. Then mount the rod high and wide enough to reduce the most common light gaps.
After installation, always test the bedroom during daylight and correct visible leakage. If you want better darkness, focus on installation coverage before immediately replacing the curtains. Follow these steps, and you can create a cleaner, faster, and more effective blackout setup.
Ready to install yours? Gather your tools, measure the window, and complete the mounting sequence today. A few accurate measurements can make the difference between ordinary curtains and a genuinely darker bedroom.